If you have ever thought refried beans are something only achievable with a lot of fuss, wait until you try this Pressure Cooker Refried Beans Recipe. This recipe transforms simple dried pinto beans into creamy, flavorful beans faster and easier than traditional stovetop methods, thanks to the magic of the pressure cooker. The beans come out perfectly tender, infused with the warmth of garlic, onion, and spices, with just the right balance of smooth and chunky textures. Whether you’re planning a taco night, a hearty dip, or a comforting side, this Pressure Cooker Refried Beans Recipe will quickly become your go-to for that authentic, homemade taste without the hassle.
Ingredients You’ll Need
Few ingredients mean a short grocery list, but each one plays an important role in building the flavor and texture of these beans. Pinto beans are the star, soaking up all the wonderful aromas, while spices and aromatics bring depth and warmth to every bite.
- Dried pinto beans: The base of this recipe, providing hearty texture and classic bean flavor.
- Onion, diced: Adds sweetness and savory background notes that marry perfectly with the beans.
- Minced green chilies (4oz can): Brings a subtle, tangy heat and a lovely pop of color.
- Garlic cloves or minced garlic: Essential for that fragrant, savory depth you want in every bite.
- Salt: Enhances all the natural flavors and balances the dish.
- Black pepper: Adds a gentle kick that complements the cumin without overpowering.
- Cumin: The warm, earthy spice that ties the whole dish together perfectly.
- Water: The cooking medium that softens the beans while infusing them with flavor.
How to Make Pressure Cooker Refried Beans Recipe
Step 1: Prep and Rinse the Beans
Start by checking your pinto beans for any small stones or debris, which is an essential step for a smooth cooking process. Place a steaming basket inside your pressure cooker’s pot if you have one handy – this makes draining easier later on. Rinse the beans under cold water until the water runs clear; this helps clean them and can reduce some of the gas-causing compounds.
Step 2: Add Ingredients to the Pressure Cooker
Next, toss the rinsed pinto beans into the pot along with the diced onion, minced green chilies, garlic, salt, black pepper, and cumin. Pour in 8 cups of water, providing plenty of liquid for the beans to cook evenly and become tender. Each of these ingredients meld beautifully under pressure, infusing the beans with a delicious, rich flavor.
Step 3: Cook Under Pressure
Seal the lid and set the steam vent to the sealing position. Select the manual or pressure cook setting on your pressure cooker and set it to high pressure for a full 60 minutes. Keep in mind that with so much water, the cooker will need about 20 to 30 minutes just to come up to pressure before the countdown begins – be patient because the results are worth it!
Step 4: Release Pressure and Drain Carefully
When the cooking time ends, carefully perform a quick release by turning the steam vent to venting, keeping your hands safe from the hot steam. Once the float valve drops, open the lid and, if you used a basket, lift it out gently to drain the beans, reserving the cooking liquid. Without a basket, use a colander placed over a bowl to separate the beans from the liquid, saving some of that flavorful bean water to adjust your beans’ consistency later on.
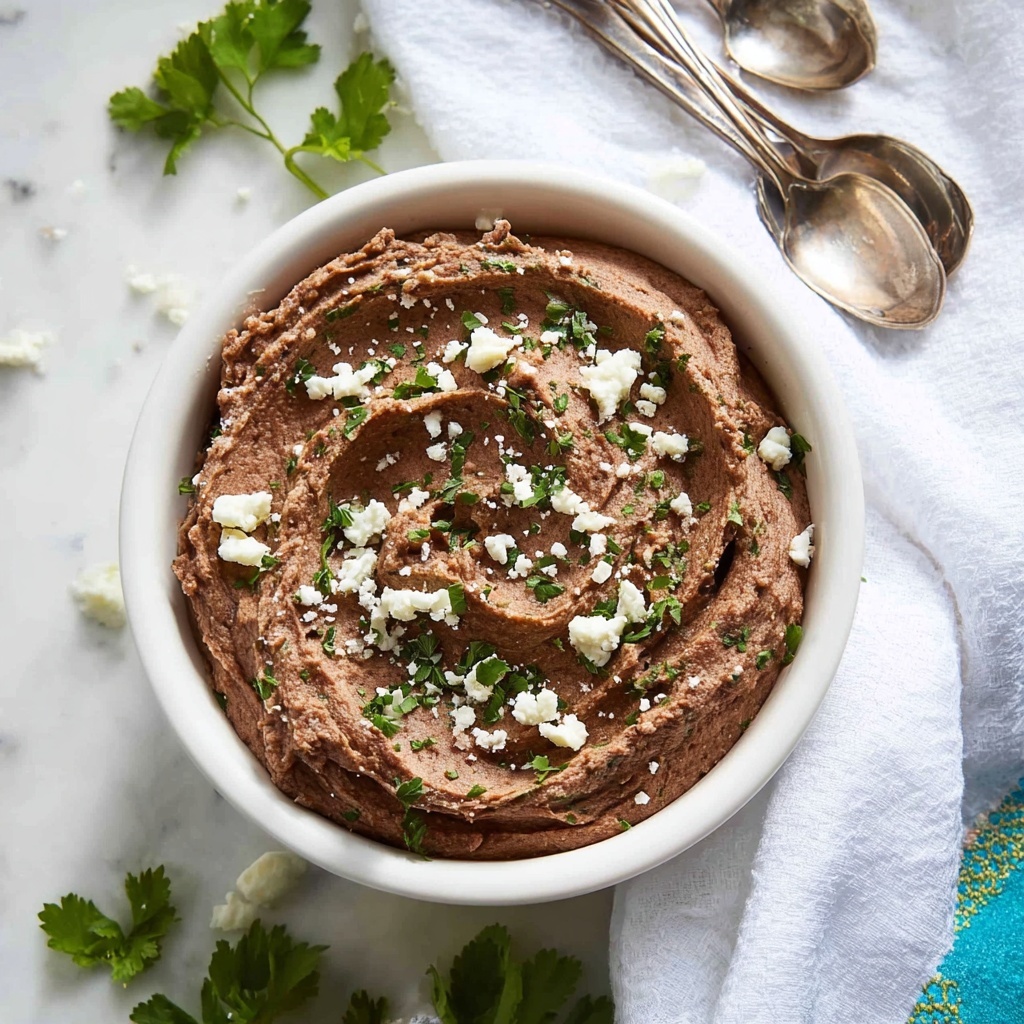
Step 5: Mash or Blend Your Beans
Now comes the fun part – turning those tender beans into creamy, luscious refried beans. Use a potato masher for a chunkier texture that feels rustic and hearty. If you prefer smooth beans, an immersion blender is your best friend, blending the beans right in the pot with ease. You can also use a standard blender in batches to avoid overcrowding. Remember to add back some of the reserved bean water little by little to achieve your perfect thickness, knowing the beans will thicken even more as they cool.
Step 6: Serve and Enjoy Immediately
Serve your freshly mashed beans warm, topped with your favorite shredded cheese or a dollop of sour cream for that irresistible finishing touch. If you want to enjoy them later, store the beans in an airtight container in the fridge for up to a week or freeze portions for longer keeping.
How to Serve Pressure Cooker Refried Beans Recipe
Garnishes
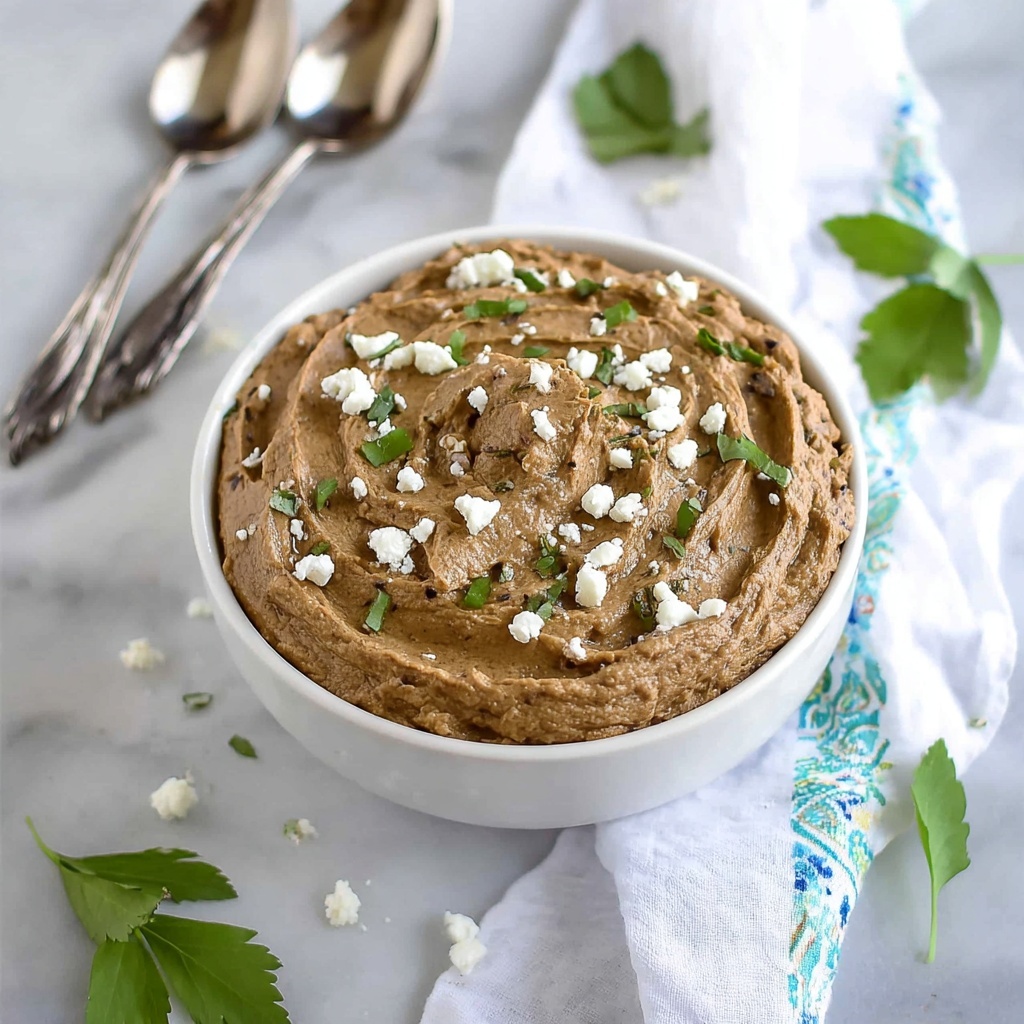
Sprinkling fresh garnishes over your refried beans instantly elevates their flavor and presentation. Think shredded cheddar or Monterey Jack cheese melting right on top, a handful of chopped cilantro for a burst of herbal freshness, or a spoonful of tangy sour cream to contrast the spices. Diced jalapeños or a drizzle of hot sauce can add an exciting kick for those who like it spicy.
Side Dishes
This Pressure Cooker Refried Beans Recipe pairs beautifully with a variety of sides. Think fluffy Spanish rice to soak up every bit of bean goodness, warm corn or flour tortillas for a classic combination, or even crispy tortilla chips to scoop up those creamy bites. Fresh garden salads with lime vinaigrette also balance the richness perfectly, making your meal feel complete and satisfying.
Creative Ways to Present
Want to impress your guests or jazz up your weeknight dinner? Use these refried beans as a base layer in a layered dip with guacamole, salsa, and cheese. They also work wonderfully stuffed inside burritos, spread on tostadas, or dolloped atop baked potatoes for a protein-packed twist. The small tweaks you make with presentation will have everyone asking for the recipe.
Make Ahead and Storage
Storing Leftovers
Leftover refried beans keep really well in the fridge when stored in an airtight container. The flavors actually deepen overnight, making the beans taste even better the next day. Just make sure to consume them within a week for the best taste and safety.
Freezing
If you want to stock up, these beans freeze beautifully. Portion them into freezer-safe containers or zip-top bags, leaving some headspace for expansion, then label and date them. They will keep their flavor and texture for up to 3 months, giving you a quick meal solution anytime you need.
Reheating
To reheat, thaw the beans overnight in the fridge if frozen, then warm them gently on the stove or in the microwave. Stir occasionally and add a splash of reserved bean water or fresh water to help loosen the beans if they have thickened too much. This will bring them back to their creamy, perfect consistency.
FAQs
Can I use canned beans instead of dried pinto beans?
While you can use canned beans, this Pressure Cooker Refried Beans Recipe really shines with dried beans. Cooking from dried beans allows for better control of texture and flavor, and it’s more economical. If you use canned, you’ll skip pressure cooking time but need to adjust seasoning and mashing accordingly.
Do I need a pressure cooker to make refried beans this way?
This recipe is designed specifically for a pressure cooker, which cuts down cooking time dramatically and delivers incredibly tender beans. You can make refried beans on the stove, but expect a much longer cooking time and more hands-on attention.
How spicy are these beans?
The green chilies add a mild to moderate heat with a slight tang. If you love spicy foods, you can add more chilies or diced jalapeños. For a milder dish, reduce the quantity or omit the chilies altogether.
Can I use black beans instead of pinto beans?
Absolutely! Black beans make a delicious alternative and will work well with the same cooking process. Just note the flavor and color will be different, but equally delicious.
What’s the best way to get the texture I want – smooth or chunky?
Use a potato masher for a chunkier, rustic texture or an immersion blender for creamy smooth beans. A regular blender can give you a very smooth result but process in smaller batches for the best consistency and safety.
Final Thoughts
I cannot recommend this Pressure Cooker Refried Beans Recipe enough for anyone who loves comfort food with minimal effort. It’s a game changer for weeknight dinners, gatherings, or whenever you want that satisfying, homemade taste in a flash. Give it a try, customize the spice levels and textures to your liking, and watch how quickly it becomes a beloved kitchen staple you’ll return to again and again.