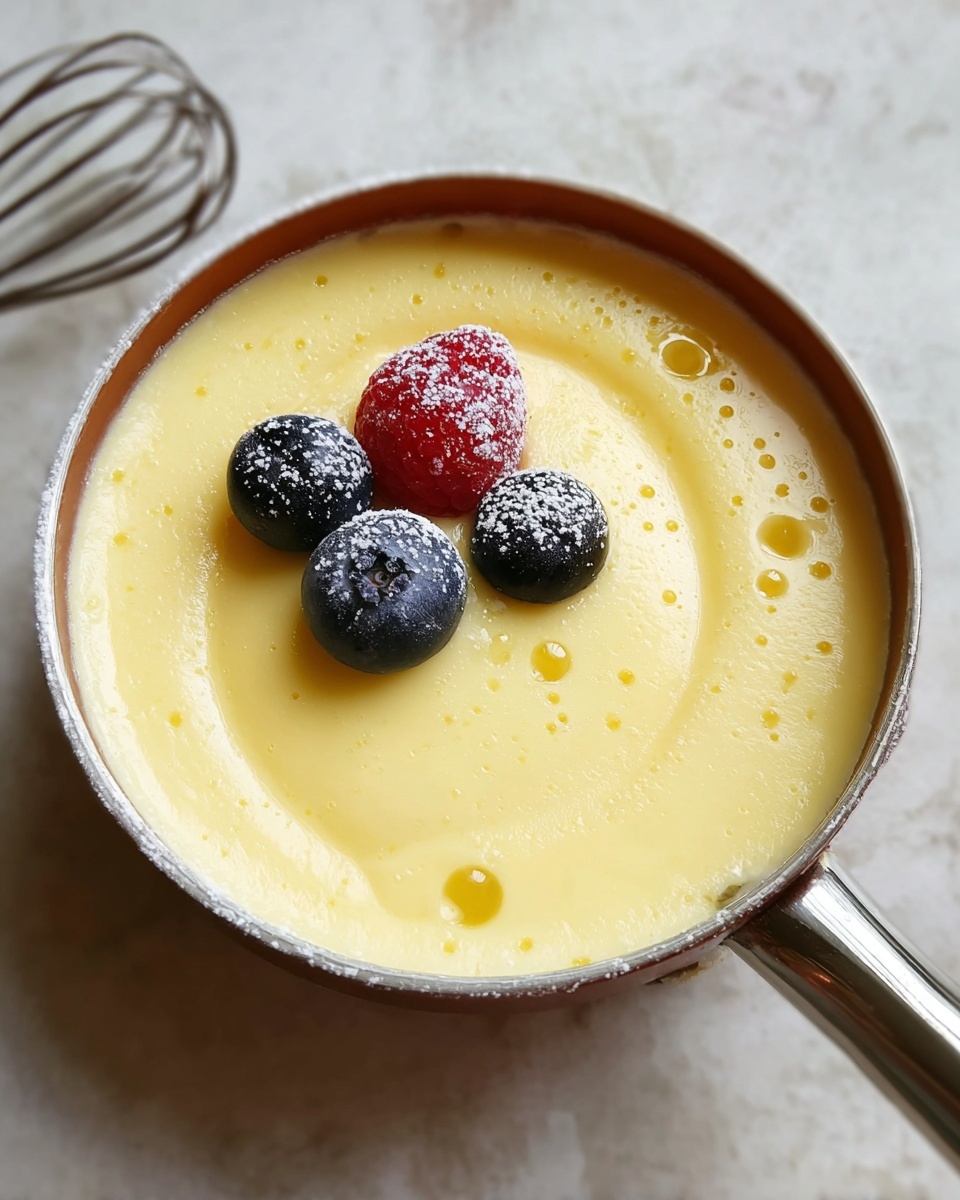
There is nothing quite like the velvety smoothness of custard freshly made at home, and this Homemade Vanilla Custard: Indulge in Creamy Perfection Recipe captures that magic perfectly. Rich yet light, deeply fragrant with pure vanilla, and luxuriously creamy, it serves as a timeless comfort that you can enjoy on its own or as the crowning glory of your favorite desserts. Whether you are a seasoned cook or a kitchen newcomer, this recipe offers a simple but rewarding way to create a classic treat that tastes like a little bit of indulgence in every spoonful.

Ingredients You’ll Need
Creating a custard this luscious really comes down to a handful of simple, quality ingredients—each playing a vital role in achieving the perfect taste, texture, and color. The combination of whole milk and cream gives it richness and body, eggs add that silky thickness, sugar balances the flavors, and vanilla brings warmth and aroma that everyone loves.
- Whole milk (2 cups): Provides a creamy base with just the right amount of fat for smoothness.
- Heavy cream (½ cup): Adds richness and luscious mouthfeel to the custard.
- Granulated sugar (½ cup): Sweetens the custard while helping with texture and browning.
- Large egg yolks (4): Essential for thickening and developing that classic custard creaminess.
- Cornstarch (1 tablespoon): Acts as a gentle thickener to stabilize the custard without cloudiness.
- Unsalted butter (1 tablespoon): Adds a glossy finish and rounded flavor.
- Pure vanilla extract (1½ teaspoons): Infuses the custard with a warm, fragrant sweetness.
- Pinch of salt: Balances the sweetness and enhances overall flavor depth.
How to Make Homemade Vanilla Custard: Indulge in Creamy Perfection Recipe
Step 1: Warm the Milk and Cream
Start by combining the whole milk and heavy cream in a medium saucepan. Heat the mixture over medium heat until you see steam rising and tiny bubbles form around the edges, but make sure it does not reach a boil. This warming step is crucial because it prevents the eggs from cooking unevenly when they are added, ensuring an ultra-smooth custard.
Step 2: Whisk Egg Yolks, Sugar, Cornstarch, and Salt
While the dairy warms, whisk together the egg yolks, sugar, cornstarch, and a pinch of salt in a separate bowl. Whisk until the mixture is perfectly smooth and pale—this helps to dissolve the sugar and break down the cornstarch for even thickening later. This vibrant mixture will be the heart of your custard’s creamy texture.
Step 3: Temper the Eggs
To prevent scrambling, slowly pour about half a cup of the warm milk and cream into the egg mixture while whisking constantly. This tempering step gently raises the egg temperature, preparing it to be combined fully with the hot dairy without curdling. It’s a simple technique that makes all the difference in custard-making.
Step 4: Combine and Thicken
Gradually whisk the tempered egg mixture back into the saucepan with the remaining warm milk and cream. Continue to cook over medium heat, stirring constantly with a wooden spoon or silicone spatula. After about 5 to 7 minutes, you will notice the custard thickens and begins to coat the back of your spoon—a clear sign it is ready.
Step 5: Finish with Butter and Vanilla
Remove the saucepan from the heat and stir in the unsalted butter and pure vanilla extract until fully incorporated. The butter adds a silky richness and shine, while the vanilla brings that signature aromatic charm that makes this recipe truly special.
Step 6: Strain and Chill
Pour the custard through a fine mesh sieve into a clean bowl to remove any lumps or bits of cooked egg. To keep the top silky and prevent a skin from forming, press a sheet of plastic wrap directly onto the surface of the custard. Chill for at least two hours before serving, allowing the flavors to meld beautifully and the custard to develop its creamy, luscious texture.
How to Serve Homemade Vanilla Custard: Indulge in Creamy Perfection Recipe
Garnishes
This custard is a perfect canvas for simple yet elegant garnishes. Fresh berries such as raspberries or blueberries add a bright tartness and vibrant color contrast. A sprinkle of toasted nuts like almonds or pistachios provides delightful crunch. You can also dust a bit of cinnamon or nutmeg for a warm spice note that complements the vanilla undertones.
Side Dishes
Homemade vanilla custard shines beautifully alongside warm desserts. Try serving it with baked apples, poached pears, or a slice of gingerbread. It also serves as a dreamy companion to rich chocolate cake, fruit tarts, or delicate pastries. The creamy texture balances and enhances these treats for a truly indulgent finale.
Creative Ways to Present
To impress your guests, consider layering the custard in parfait glasses with granola and fresh fruit for a delightful breakfast or dessert treat. For a more classic presentation, spoon it generously into dainty ramekins and top with caramelized sugar to create a quick crème brûlée-style dessert. You can even use it as a luscious filling for éclairs, tarts, or trifles, making your desserts extra special.
Make Ahead and Storage
Storing Leftovers
Leftover custard keeps beautifully for up to three days when stored in an airtight container in the refrigerator. Keeping the plastic wrap pressed to the surface ensures no skin forms and the custard remains silky smooth. Whenever you crave a quick dessert or filling, your custard will be ready and waiting.
Freezing
While freezing is possible, it can alter the texture of custard due to ice crystal formation. If needed, freeze it in a freezer-safe container for up to one month. When thawed, the custard may be a bit grainy, so it’s best enjoyed freshly made or refrigerated rather than frozen for optimal creaminess.
Reheating
To bring chilled custard back to serving temperature, gently warm it over low heat on the stovetop while stirring constantly. Avoid boiling, as high heat can cause curdling. Alternatively, warm servings individually in the microwave in short bursts, stirring between intervals to preserve the smooth texture and delicate flavor.
FAQs
Can I use low-fat milk instead of whole milk?
For the creamiest and richest custard, whole milk and cream are recommended. Using low-fat milk will result in a thinner texture and less luxurious mouthfeel, but it will still taste good if you prefer a lighter version.
How do I prevent the custard from curdling?
Tempering the eggs slowly by adding warm milk bit by bit and cooking the custard over medium heat with constant stirring are key to avoiding curdling. Don’t rush these steps to keep your custard perfectly smooth.
Can I make this recipe vegan or dairy-free?
Yes! Substitute the whole milk and heavy cream with full-fat coconut milk and swap the butter for a plant-based alternative. The texture and flavor will be slightly different but still delightful.
Is cornstarch necessary in this recipe?
Cornstarch helps stabilize the custard and prevents it from becoming too runny, especially when reheated or served warm. You can omit it for a more traditional egg-thickened custard, but expect a softer set.
How long does the custard keep in the fridge?
This homemade vanilla custard stays fresh and delicious for up to three days when stored properly in the fridge. Beyond that, the texture and flavor might start to deteriorate, so it’s best enjoyed within this window.
Final Thoughts
I can’t recommend this Homemade Vanilla Custard: Indulge in Creamy Perfection Recipe enough for anyone looking to fill their kitchen with the comforting aroma and taste of classic French dessert. Rich, velvety, and wonderfully versatile, it’s a recipe that brings warmth and sweetness to any occasion. Give it a try—you might find it quickly becomes one of your favorites to share with family and friends.