
If you have a sweet tooth and love a classic cookie that bursts with fruity goodness, this Fruit Filled Thumbprint Cookies Recipe is your new best friend. These delightful cookies combine a tender, buttery base with a vibrant center of your favorite fruit preserves, creating a perfect balance of textures and flavors that make every bite truly special. Whether you’re baking for a holiday, a casual get-together, or just because the craving strikes, these cookies are easy to make and always a crowd-pleaser.
Ingredients You’ll Need
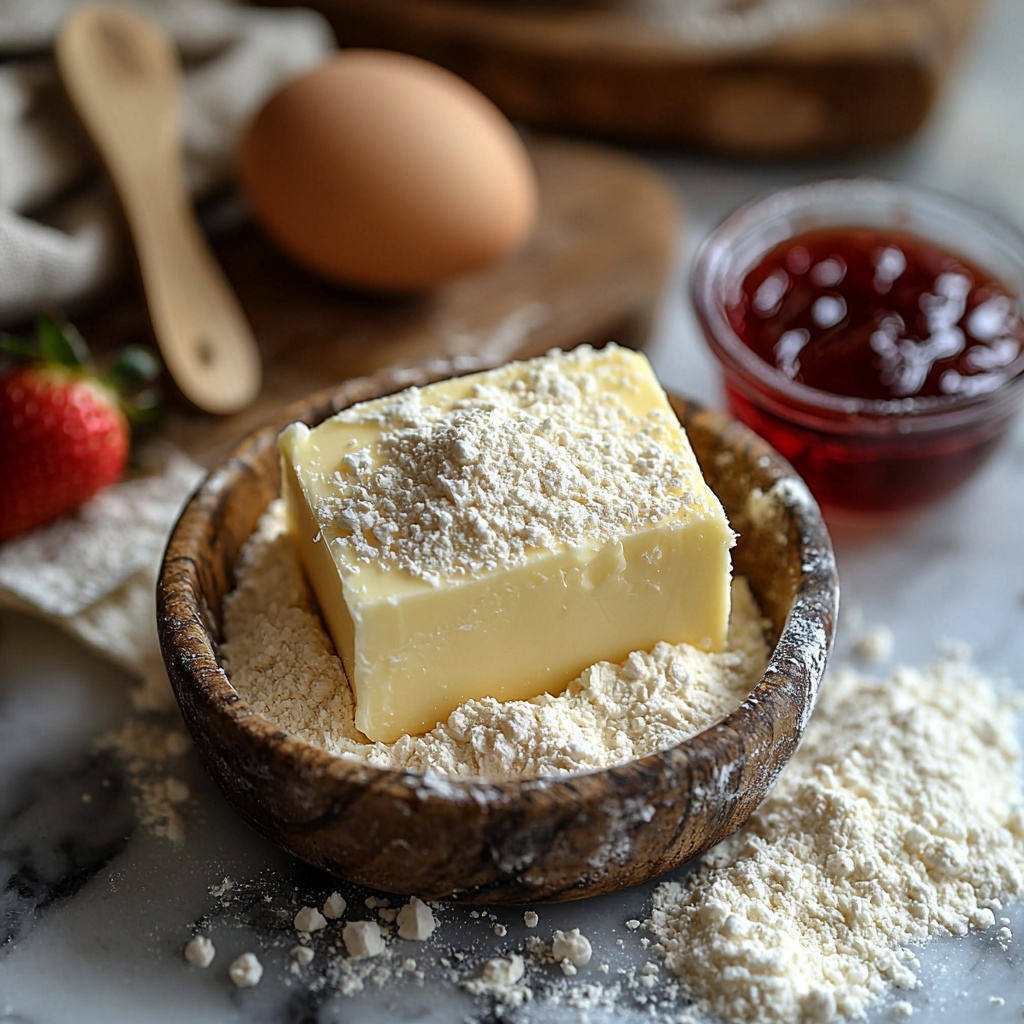
The magic of this Fruit Filled Thumbprint Cookies Recipe lies in a handful of simple yet essential ingredients. Each one plays a crucial role in achieving that perfect cookie texture and flavor — from the rich butter that keeps things tender to the vibrant fruit preserves that add a burst of sweetness and color.
- All-purpose flour: The sturdy base that gives structure to your cookie without overpowering the flavor.
- Unsalted butter: Softened for easy mixing; it adds moisture and that irresistible richness.
- Granulated sugar: Adds sweetness and helps achieve a delicate crunch on the outside.
- Egg yolk: Provides richness and binds the dough together perfectly.
- Vanilla extract: A small touch that elevates the flavor with warmth and depth.
- Fruit preserves: The star filling—select your favorite, like strawberry or raspberry, for a beautiful burst of flavor.
How to Make Fruit Filled Thumbprint Cookies Recipe
Step 1: Prepare Your Workspace
Before diving in, preheat your oven to 350°F (175°C) and line a baking sheet with parchment paper. This ensures your cookies bake evenly and won’t stick to the pan, making clean-up a breeze.
Step 2: Cream Butter and Sugar
In a mixing bowl, beat together the softened butter and granulated sugar until the mixture is light, fluffy, and pale in color. This step is key because it introduces air into the dough for a tender, melt-in-your-mouth texture.
Step 3: Add Egg Yolk and Vanilla
Mix in the egg yolk and vanilla extract until everything is well combined, adding richness and a hint of that beloved vanilla aroma that sets these cookies apart.
Step 4: Incorporate the Flour
Gradually add the all-purpose flour to your bowl, stirring gently until a soft dough forms. Avoid over-mixing here; you want the dough to be tender without becoming tough.
Step 5: Shape and Indent the Dough
Roll the dough into tablespoon-sized balls and place them spaced about two inches apart on your prepared baking sheet. Using your thumb, press gently into the center of each ball to create a well for the jam filling. This indentation is what makes these cookies unmistakable.
Step 6: Fill and Bake
Carefully spoon a small amount of fruit preserves into each thumbprint, being mindful not to overfill to prevent spilling. Bake the cookies for 12 to 15 minutes, or until the edges turn a lovely light golden color. Let them cool on the baking sheet for a few minutes before transferring to a wire rack to cool completely.
How to Serve Fruit Filled Thumbprint Cookies Recipe
Garnishes
To make your cookies even more irresistible, consider dusting them lightly with powdered sugar once cooled—that delicate sweetness adds a pretty finishing touch and enhances the fruity center. A small fresh mint leaf next to each cookie can also brighten the presentation.
Side Dishes
These cookies pair wonderfully with a cup of tea or coffee, making them a perfect afternoon treat. If you’re serving at a party, a small bowl of whipped cream or a scoop of vanilla ice cream on the side complements the fruit preserves beautifully and adds an extra layer of indulgence.
Creative Ways to Present
Get creative by arranging your Fruit Filled Thumbprint Cookies on a brightly colored platter or a wooden board with fresh berries and edible flowers for a stunning display. You can also experiment with different fruit preserves for an eye-catching variety, mixing strawberry, raspberry, apricot, or even fig preserves for a delightful rainbow of flavors.
Make Ahead and Storage
Storing Leftovers
You can keep your cookies fresh for up to a week by storing them in an airtight container at room temperature. Be sure to separate layers with parchment paper to prevent sticking and maintain that perfect thumbprint jewel.
Freezing
If you want to enjoy these cookies later, they freeze beautifully. Arrange them in a single layer on a baking sheet and freeze until firm, then transfer to a freezer-safe container, separating layers with parchment paper. They can be frozen for up to three months without losing flavor or texture.
Reheating
When you’re ready to enjoy, simply thaw the cookies at room temperature. If you like them warm, pop them in a preheated oven at 300°F for 5 minutes—just enough to bring back that freshly baked sensation without melting the fruit filling.
FAQs
Can I use other types of jam or preserves in this Fruit Filled Thumbprint Cookies Recipe?
Absolutely! The beauty of this recipe is its versatility. Feel free to experiment with apricot, blackberry, or even marmalade to find your favorite flavor combination.
Is it possible to make these cookies gluten-free?
Yes, by substituting the all-purpose flour with a gluten-free flour blend suitable for baking, you can make these cookies gluten-free. Just make sure the blend contains xanthan gum or similar for the best texture.
How do I prevent the jam from bubbling over during baking?
Use a small spoonful of jam and avoid overfilling each indentation. Also, placing the thumbprints slightly apart helps the heat circulate evenly and reduces the risk of spills.
Can I add nuts or other toppings to these cookies?
Definitely! You can press finely chopped nuts or sprinkles into the dough before baking for extra crunch and flair. Just be mindful of how much you add so the cookies still bake evenly.
What’s the best way to keep these cookies soft?
Store them in an airtight container at room temperature and consider adding a slice of bread to the container—the bread helps maintain moisture and keeps the cookies soft longer.
Final Thoughts
There’s something so comforting and timeless about a batch of thumbprint cookies filled with sweet fruit preserves, and this Fruit Filled Thumbprint Cookies Recipe is a surefire way to bring that happiness into your kitchen. They’re simple, delightful, and made all the more special by the love that goes into every step. I encourage you to give this recipe a try and watch these charming cookies become a beloved staple in your home.
Print
Fruit Filled Thumbprint Cookies Recipe
- Prep Time: 15 minutes
- Cook Time: 15 minutes
- Total Time: 30 minutes
- Yield: 12 servings
- Category: Dessert
- Method: Baking
- Cuisine: American
Description
Delightfully buttery and tender thumbprint cookies filled with sweet fruit preserves, perfect for a simple yet elegant treat that’s easy to make and sure to impress.
Ingredients
Cookie Dough
- 1 cup all-purpose flour
- 1/2 cup unsalted butter, softened
- 1/3 cup granulated sugar
- 1 egg yolk
- 1 tsp vanilla extract
Filling
- 1/2 cup fruit preserves (e.g., strawberry or raspberry)
Instructions
- Preheat Oven: Preheat your oven to 350°F (175°C) and line a baking sheet with parchment paper to prevent sticking and ensure even baking.
- Cream Butter and Sugar: In a mixing bowl, cream together the softened butter and granulated sugar until the mixture is light and fluffy, which takes about 2-3 minutes. This creates a tender texture in the cookies.
- Add Egg Yolk and Vanilla: Add the egg yolk and vanilla extract to the creamed butter and sugar. Mix thoroughly until all ingredients are well combined and the batter is smooth.
- Add Flour: Gradually add the all-purpose flour to the wet ingredients, mixing gently until a soft, cohesive dough forms without overworking it to keep the cookies tender.
- Shape Dough Balls: Roll the dough into tablespoon-sized balls and arrange them on the prepared baking sheet, spacing them about two inches apart to allow for baking expansion.
- Create Thumbprints: Using your thumb or the back of a spoon, gently press an indentation into the center of each dough ball to form a well for the filling.
- Fill with Preserves: Spoon about a teaspoon of fruit preserves into each thumbprint indent, taking care not to overfill to avoid spilling during baking.
- Bake Cookies: Bake in the preheated oven for 12-15 minutes, or until the edges are lightly golden and the centers are set, signaling the cookies are baked through.
- Cool: Allow the cookies to cool on the baking sheet for a few minutes to firm up, then carefully transfer them to a wire rack to cool completely. This prevents over-baking and helps maintain texture.
Notes
- Use room temperature butter for easier creaming and better texture.
- Choose your favorite fruit preserves; raspberry, strawberry, or apricot work wonderfully.
- You can substitute all-purpose flour with gluten-free flour mix for a gluten-free version.
- For a richer flavor, add a pinch of salt to balance the sweetness.
- Store cookies in an airtight container at room temperature for up to 5 days.


