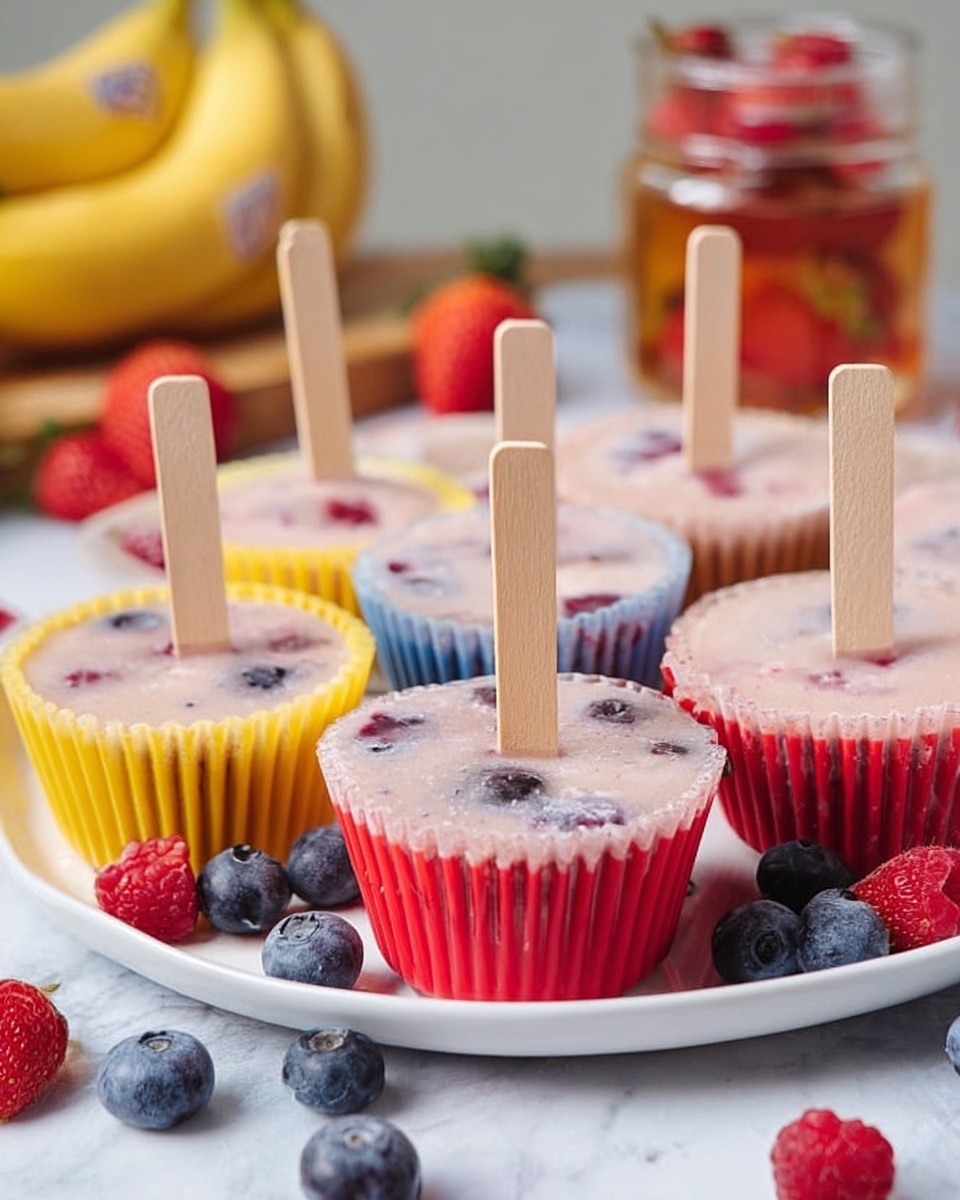
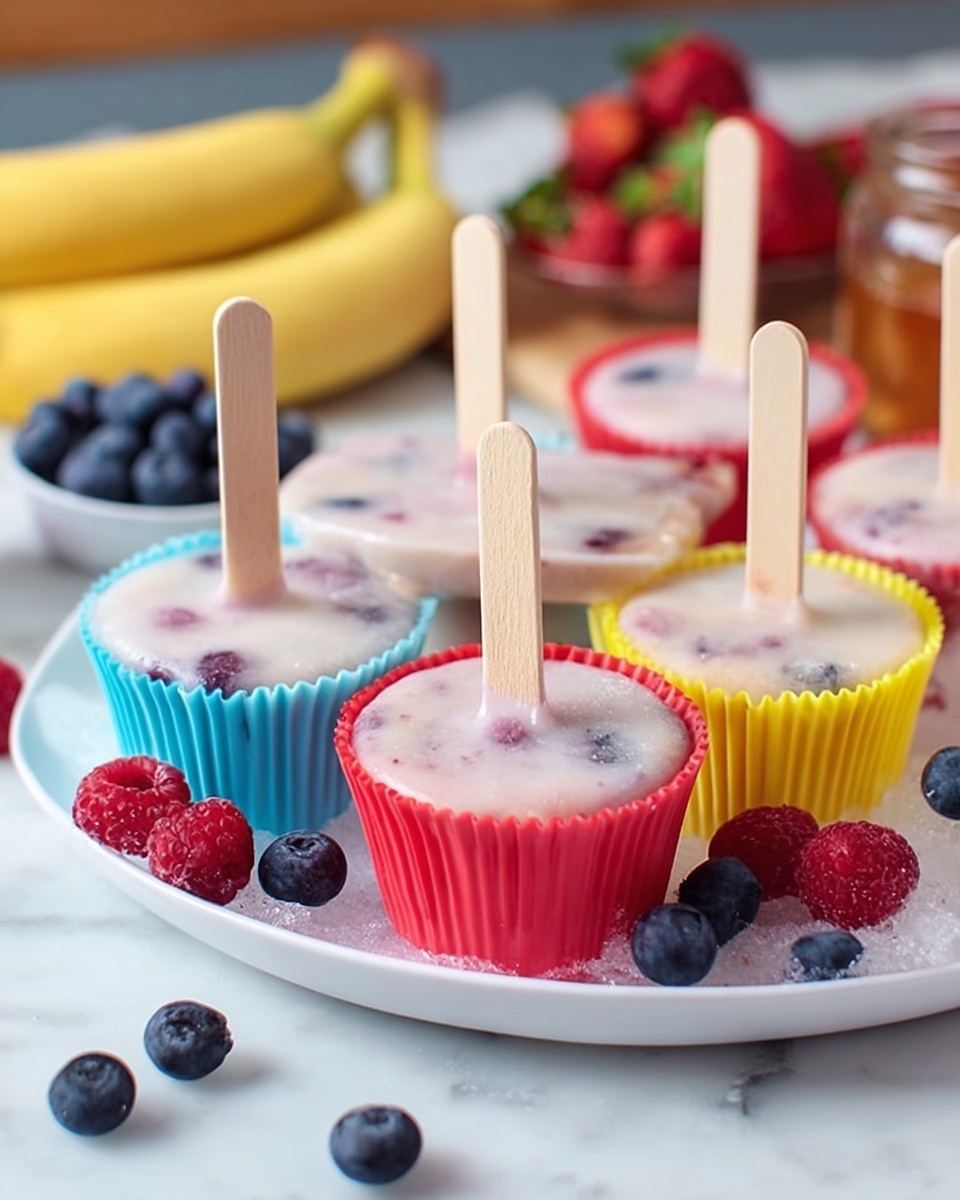
If you’re searching for a delightful, refreshing treat that’s both healthy and easy to make, look no further than our Frozen Yogurt Pops: The Ultimate Guide to Homemade Treats Recipe. These vibrant, creamy pops are bursting with juicy berries and just the right touch of sweetness, making them the perfect cool-down snack for warm days or whenever you crave something light yet satisfying. Whether you’re sharing with family or sneaking a personal indulgence, these frozen delights combine wholesome ingredients with fun presentation, promising smiles with every bite.
Ingredients You’ll Need
Gathering the right ingredients for this recipe is straightforward, but each component plays a crucial role in creating that irresistible texture, flavor, and color that make these pops special. From creamy Greek yogurt to the zingy brightness of lemon juice, every addition enhances your final creation.
- 2 cups plain Greek yogurt: Provides a rich and creamy base full of protein and tang.
- 2–3 tablespoons honey or maple syrup: Adds natural sweetness tailored to your taste preferences.
- 1 teaspoon pure vanilla extract: Brings warm, fragrant undertones that elevate the yogurt’s flavor.
- 1 cup mixed fresh or frozen berries: Infuses vibrant color, juicy bursts, and antioxidants.
- 1 tablespoon lemon juice: Gives a fresh citrus touch that complements the berries.
- 1/2 cup granola or crushed cookies (optional): Introduces a crunchy texture contrast for extra enjoyment.
How to Make Frozen Yogurt Pops: The Ultimate Guide to Homemade Treats Recipe
Step 1: Mix the Yogurt Base
Start by combining the plain Greek yogurt, honey (or maple syrup), and vanilla extract in a medium bowl. Stir the mixture until it’s smooth and all the sweetener is fully blended. This creamy, sweetened yogurt will form the luscious foundation of your pops.
Step 2: Prepare the Berries
In another bowl, toss the fresh or frozen mixed berries with the lemon juice. Then, gently mash the berries just enough to release some of their natural juices, creating a vibrant and slightly chunky fruit mixture. This step is key to achieving that beautiful marbled effect later on.
Step 3: Layer and Swirl
Begin layering your frozen yogurt pops by alternating spoonfuls of the yogurt mixture and the lemon-tossed berries into popsicle molds. For a stunning marbled look, use a skewer or the handle of a spoon to gently swirl the layers together, but avoid overmixing so the colors stay distinct and pretty.
Step 4: Add a Crunchy Surprise (Optional)
If you love a bit of texture, sprinkle a thin layer of granola or crushed cookies between the layers as you build your pops. This surprise crunch takes your Frozen Yogurt Pops: The Ultimate Guide to Homemade Treats Recipe to the next level of delicious fun.
Step 5: Freeze Until Firm
Insert the popsicle sticks and place the molds in the freezer. Let them freeze for at least 4 hours or until completely solid. When ready to enjoy, briefly run warm water on the outside of the molds to loosen the pops and then enjoy immediately or store for later indulgence.
How to Serve Frozen Yogurt Pops: The Ultimate Guide to Homemade Treats Recipe
Garnishes
To brighten up your presentation, consider topping your frozen pops with fresh berries, a drizzle of honey, or a sprinkle of finely chopped nuts just before serving. These little touches add a burst of color and texture that make every bite even more special.
Side Dishes
Frozen yogurt pops shine as a light dessert or snack on their own, but pairing them with fresh fruit salads or crunchy nuts can turn your treat into a wholesome, balanced mini-breakfast or afternoon delight. They also complement a casual picnic or pool party beautifully.
Creative Ways to Present
For parties, try serving your pops in a container filled with crushed ice or scatter edible flower petals around the base for a whimsical touch. Individual clear cups can also double as festive holders, especially if you insert decorative straws alongside the pops.
Make Ahead and Storage
Storing Leftovers
If you make more pops than you can eat in one sitting, no worries! Simply place the leftover frozen yogurt pops in an airtight container or zip-lock bag to prevent freezer burn and keep them tasting fresh for up to 2 weeks.
Freezing
These pops freeze wonderfully thanks to the thick Greek yogurt base. Just be sure your popsicle molds have tight-fitting lids or carefully wrap the tops to avoid any unwanted ice crystals forming during long-term storage.
Reheating
Since Frozen Yogurt Pops: The Ultimate Guide to Homemade Treats Recipe are meant to be enjoyed frozen, reheating isn’t necessary. Instead, if they’ve been in the freezer for a while and are very hard, simply let them sit at room temperature for a few minutes before serving for a softer bite.
FAQs
Can I use flavored yogurt instead of plain Greek yogurt?
Absolutely! Flavored yogurts like vanilla, coconut, or lemon add extra dimension to your pops without any additional effort. Just keep in mind that sweeter yogurts may reduce the amount of honey or maple syrup you need.
Can I make these pops dairy-free?
Yes, you can swap Greek yogurt for coconut or almond milk yogurt to make a delicious dairy-free version without losing the creamy texture that makes these treats so enjoyable.
How can I prevent the berries from sinking to the bottom?
Lightly mashing the berries releases juices that help suspend them in the yogurt base. Also, alternating thin layers and gently swirling the mixtures helps distribute the fruit evenly throughout the popsicles.
Are these popsicles suitable for kids?
Definitely! These frozen treats are naturally sweetened and packed with wholesome ingredients, making them a perfect healthy snack option for children of all ages.
How long do Frozen Yogurt Pops: The Ultimate Guide to Homemade Treats Recipe last in the freezer?
For the best texture and flavor, enjoy your pops within two weeks of freezing. Beyond that, they might develop ice crystals and lose some creaminess.
Final Thoughts
I hope this warm and fun Frozen Yogurt Pops: The Ultimate Guide to Homemade Treats Recipe inspires you to whip up your very own batch of these irresistible frozen gems. They’re not only incredibly easy to make but also wonderfully adaptable to your favorite flavors and preferences. Once you try these pops, they just might become your go-to summer treat or anytime snack everyone in your household will love.