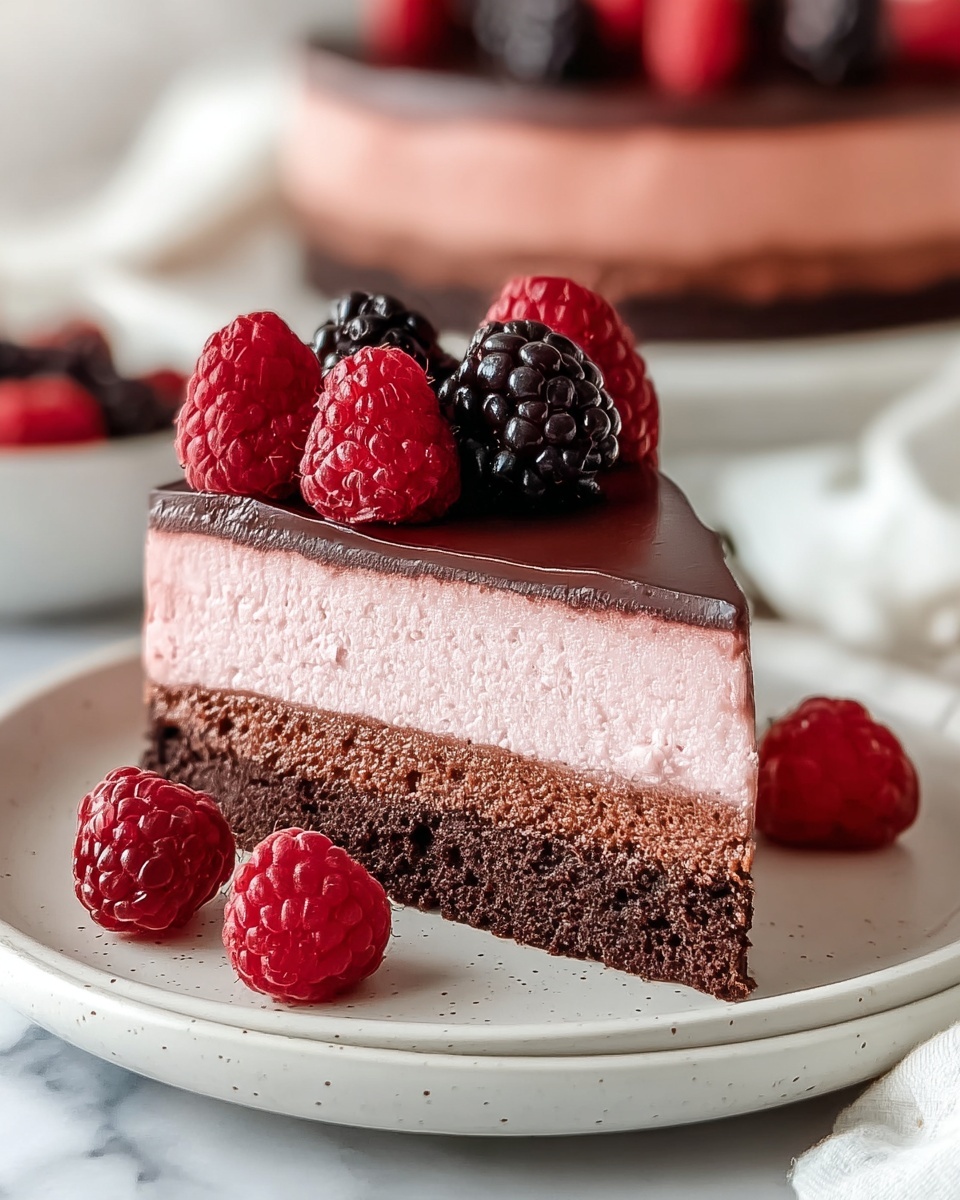
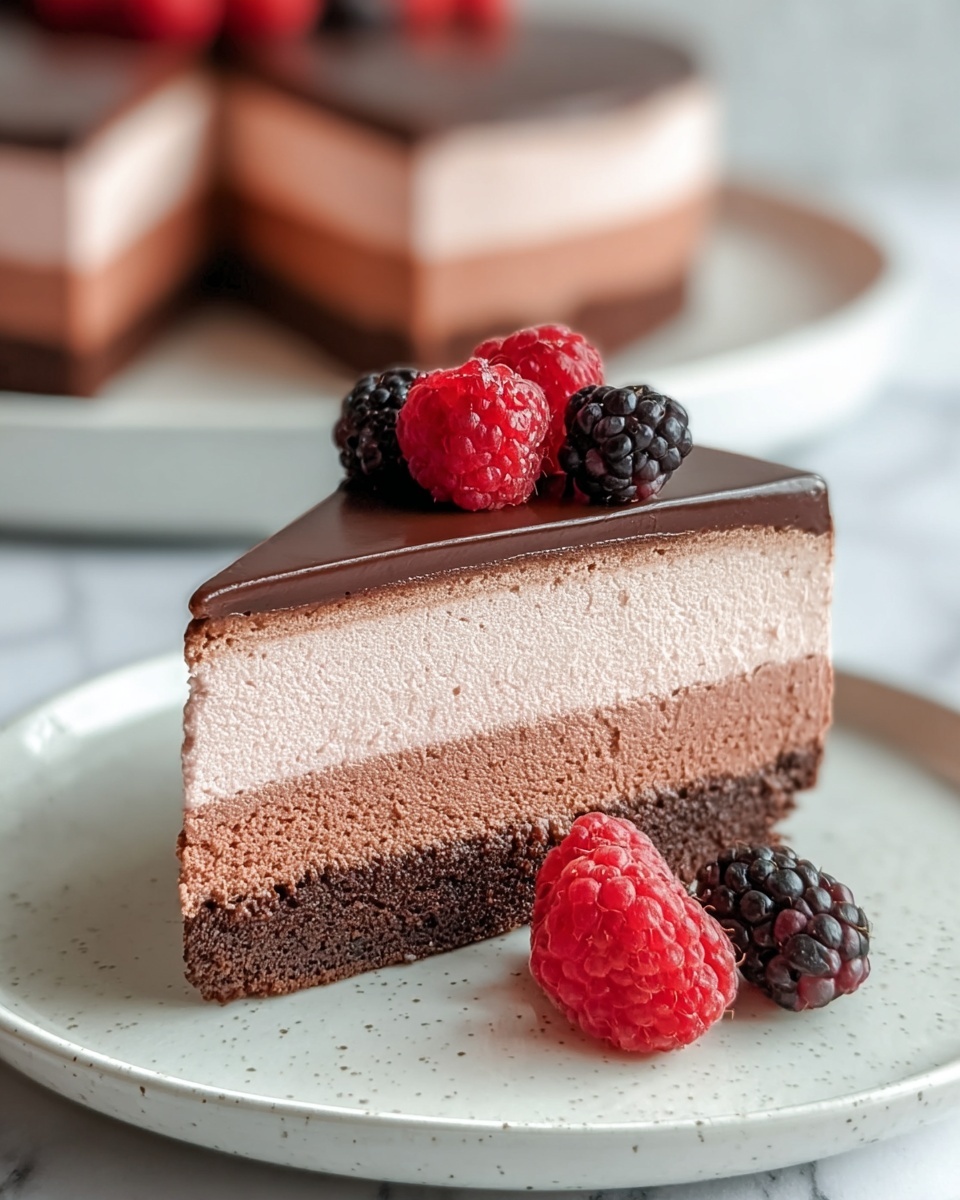
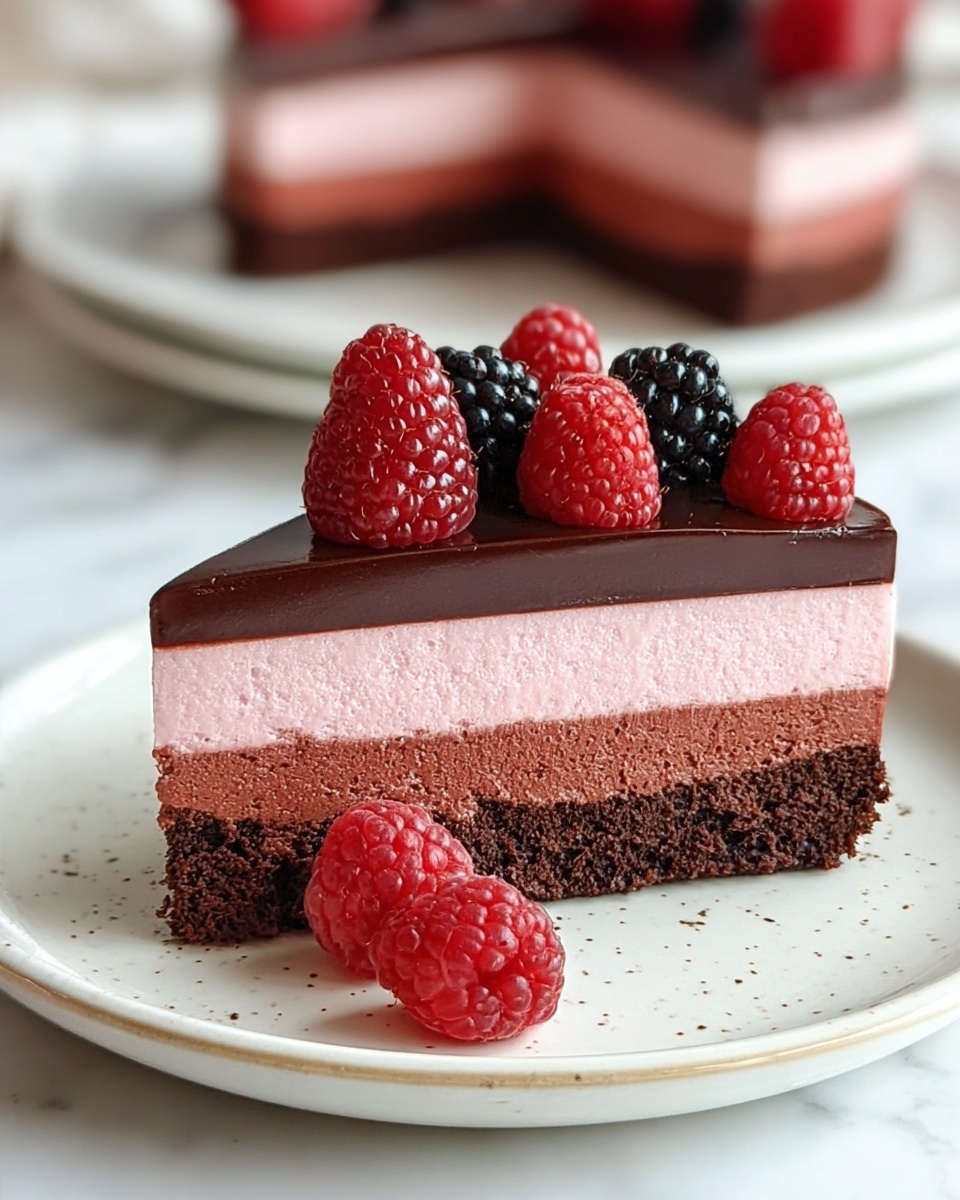
If you are searching for a dessert that feels like a love letter to your taste buds, look no further than this Chocolate Raspberry Mousse Cake Recipe. This stunning cake combines the rich decadence of chocolate with the bright, fruity zing of raspberries, creating a harmonious balance that is both elegant and deeply satisfying. Whether you’re celebrating a special occasion or simply craving something extraordinary, this recipe delivers luscious layers of texture and flavor in every bite. It’s a true showstopper that’s surprisingly approachable to make, perfect for both dessert newbies and seasoned bakers alike.
Ingredients You’ll Need
Each ingredient in this Chocolate Raspberry Mousse Cake Recipe plays a vital role, from creating the perfect cakey base to achieving the airy, luxurious mousse topping. The ingredients are simple but essential, ensuring a rich, balanced dessert that’s bursting with flavor and texture.
- Sugar (1 cup / 200g): Adds sweetness and helps create a moist, tender cake base.
- Unsalted butter, melted (½ cup / 115g): Provides richness and a smooth texture to the brownie layer.
- Large eggs (2): Bind the ingredients together and give structure to the cake.
- All-purpose flour (½ cup / 60g): The foundation of the cake, giving it body without overwhelming density.
- Unsweetened cocoa powder (½ cup / 50g): Imparts deep chocolate flavor and beautiful color.
- Heavy cream (1 cup / 250ml): Whipped to stiff peaks, it transforms the raspberry mixture into a light, fluffy mousse.
- Raspberry puree (½ cup / 120g): Brings natural fruitiness and vibrant color that complement the chocolate.
- Sugar (¼ cup / 50g): Sweetens the mousse without overpowering the tartness of the raspberries.
- Gelatin powder (1 teaspoon): Essential for setting the mousse so it holds its perfect texture.
- Water (2 tablespoons): Used to bloom the gelatin and help it incorporate smoothly.
How to Make Chocolate Raspberry Mousse Cake Recipe
Step 1: Prepare the Cake Base
Preheat your oven to 350°F (175°C). This sets the stage for your delicious cake. Grease and line a 9-inch round cake pan with parchment paper to ensure easy removal and a smooth edge once baked.
Step 2: Mix Sugar and Butter
In a mixing bowl, combine the sugar and melted butter. This combination infuses your cake with moisture and sweetness right from the start. Add the eggs one at a time, mixing well to ensure the batter becomes smooth and uniform.
Step 3: Incorporate Dry Ingredients
Sift in the all-purpose flour and unsweetened cocoa powder to keep the batter airy and free of lumps. Gently stir the mixture until smooth, revealing that rich chocolatey color that makes this cake irresistible even before baking.
Step 4: Bake the Cake
Pour your chocolate batter into the prepared pan, smoothing the top with a spatula. Bake for 20 to 25 minutes until a toothpick inserted into the center comes out clean, signaling a perfectly baked cake base with just the right amount of fudgy texture.
Step 5: Cool the Brownie Base
Allow the brownie to cool completely in the pan. Patience here is key—it prevents the mousse layer from melting or sliding off during assembly.
Step 6: Bloom the Gelatin
Sprinkle gelatin powder over water in a small bowl and let it sit for 5 minutes. This blooming step ensures the gelatin melts evenly when incorporated into the raspberry mixture, providing a perfect set for the mousse.
Step 7: Prepare Raspberry Mixture
In a small saucepan, gently heat the raspberry puree and sugar together over low heat until the sugar dissolves. Remove from heat and stir in the bloomed gelatin until fully dissolved, resulting in a smooth, tangy base for the mousse.
Step 8: Cool the Raspberry Mixture
Let the raspberry and gelatin mixture cool to room temperature, which is crucial to prevent it from melting the whipped cream in the next step.
Step 9: Whip the Heavy Cream
In a clean bowl, whip the heavy cream until stiff peaks form. This creates the light and airy texture that makes the mousse so delightfully fluffy.
Step 10: Fold in the Raspberry Mixture
Gently fold the cooled raspberry mixture into the whipped cream. Work carefully to keep the airiness intact so your mousse stays light and tender.
Step 11: Remove Brownie Base from Pan
Once fully cooled, lift the brownie base out of the cake pan using the parchment paper and transfer it to a serving platter, the perfect canvas for your luscious mousse topping.
Step 12: Spread the Raspberry Mousse
Evenly spread the raspberry mousse over the brownie base, using a spatula to create a smooth, inviting surface for chilling.
Step 13: Refrigerate
Refrigerate the assembled cake for at least 4 hours to let the mousse fully set into a creamy, sliceable layer that pairs beautifully with the rich chocolate base.
How to Serve Chocolate Raspberry Mousse Cake Recipe
Garnishes
Top this Chocolate Raspberry Mousse Cake Recipe with fresh raspberries and a light dusting of cocoa powder or powdered sugar for an elegant touch. A few chocolate shavings or curls add a sophisticated flair that enhances each slice’s visual appeal.
Side Dishes
Pair the cake with a scoop of vanilla bean ice cream or a dollop of whipped cream to complement the rich chocolate and tangy raspberry flavors. Fresh mint leaves or a drizzle of raspberry coulis can also beautifully balance each bite.
Creative Ways to Present
For a festive twist, serve individual portions in clear glass cups to showcase the distinct layers of chocolate cake and raspberry mousse. Alternatively, try garnishing with edible flowers for a stunning, Instagram-worthy dessert table presentation.
Make Ahead and Storage
Storing Leftovers
This Chocolate Raspberry Mousse Cake Recipe keeps beautifully in the refrigerator for up to 3 days, allowing the flavors to meld even further. Be sure to cover it with plastic wrap or store in an airtight container to maintain moisture and freshness.
Freezing
If you want to prepare the cake ahead of time for a special occasion, this cake freezes well. Wrap it tightly in plastic wrap and then in aluminum foil before freezing. When ready to serve, thaw it overnight in the refrigerator to preserve the delicate mousse texture.
Reheating
This cake is best enjoyed chilled, so reheating is not recommended as it might alter the mousse’s consistency. Instead, let any frozen cake thaw slowly in the fridge for the perfect slice every time.
FAQs
Can I use fresh raspberries instead of raspberry puree?
Fresh raspberries can be turned into puree by blending and straining out the seeds. Using fresh fruit will add a lovely brightness, but ensure to cook the puree with sugar to dissolve the gelatin properly.
Is there a substitute for gelatin?
Agar-agar is a popular plant-based substitute for gelatin. However, using it requires slight modifications in preparation and quantities, so be sure to follow specific guidelines when substituting.
Can this cake be made gluten-free?
Absolutely! Substitute the all-purpose flour with a gluten-free blend that can be used cup-for-cup in baking. This will keep the cake texture similar while making it safe for gluten intolerances.
How do I know when the cake base is fully baked?
The best test is the toothpick test: insert a toothpick into the center of the cake, and if it comes out clean or with just a few moist crumbs, your cake is ready.
Can I make this cake without a mixer?
Yes, though whipping the cream by hand will take longer and more effort. Use a large bowl and a whisk to beat the cream until you see stiff peaks—it’s a great workout and very satisfying!
Final Thoughts
This Chocolate Raspberry Mousse Cake Recipe is truly a treasure worth making again and again. The elegant combination of rich chocolate and bright raspberry mousse never fails to delight and impress. Whether you’re sharing it with loved ones or savoring a special treat yourself, this cake brings warmth, joy, and a touch of celebration to any day. Go ahead, whip it up and make your dessert moment unforgettable!