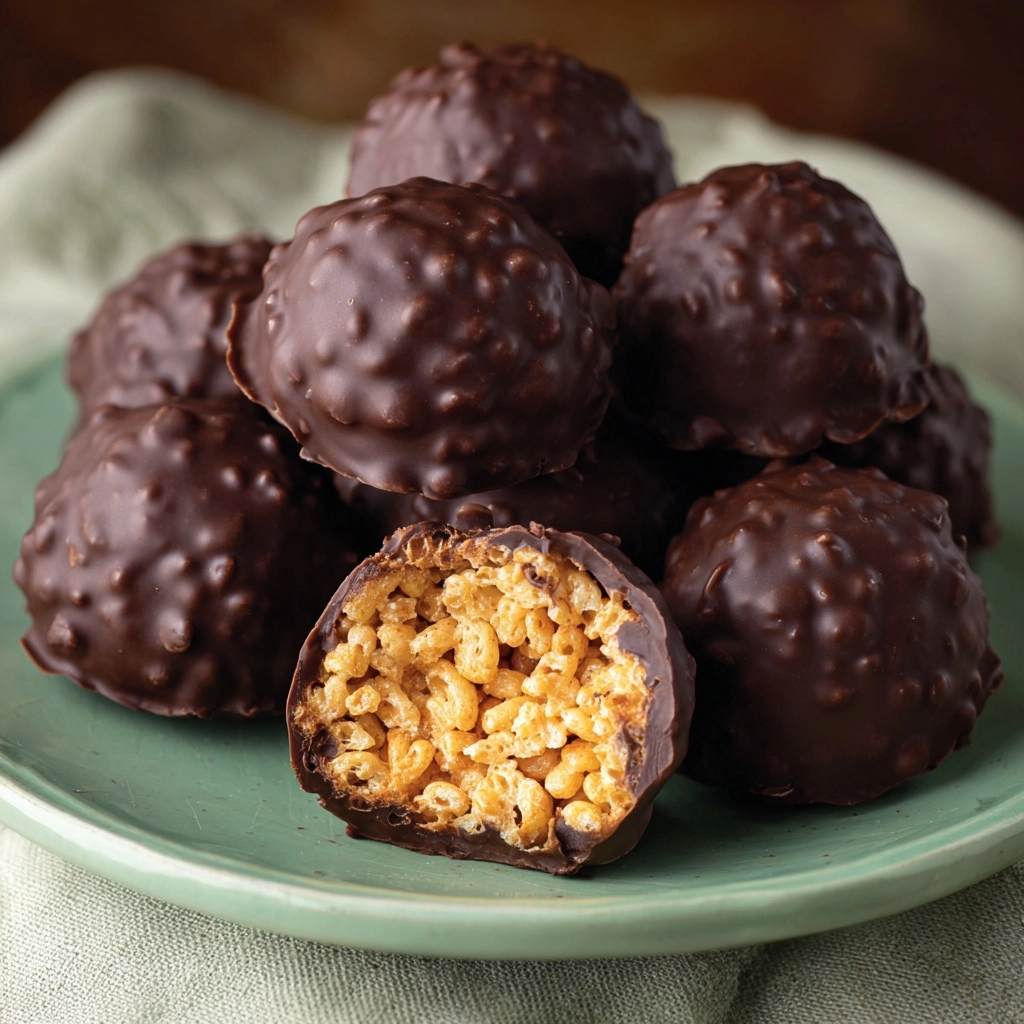
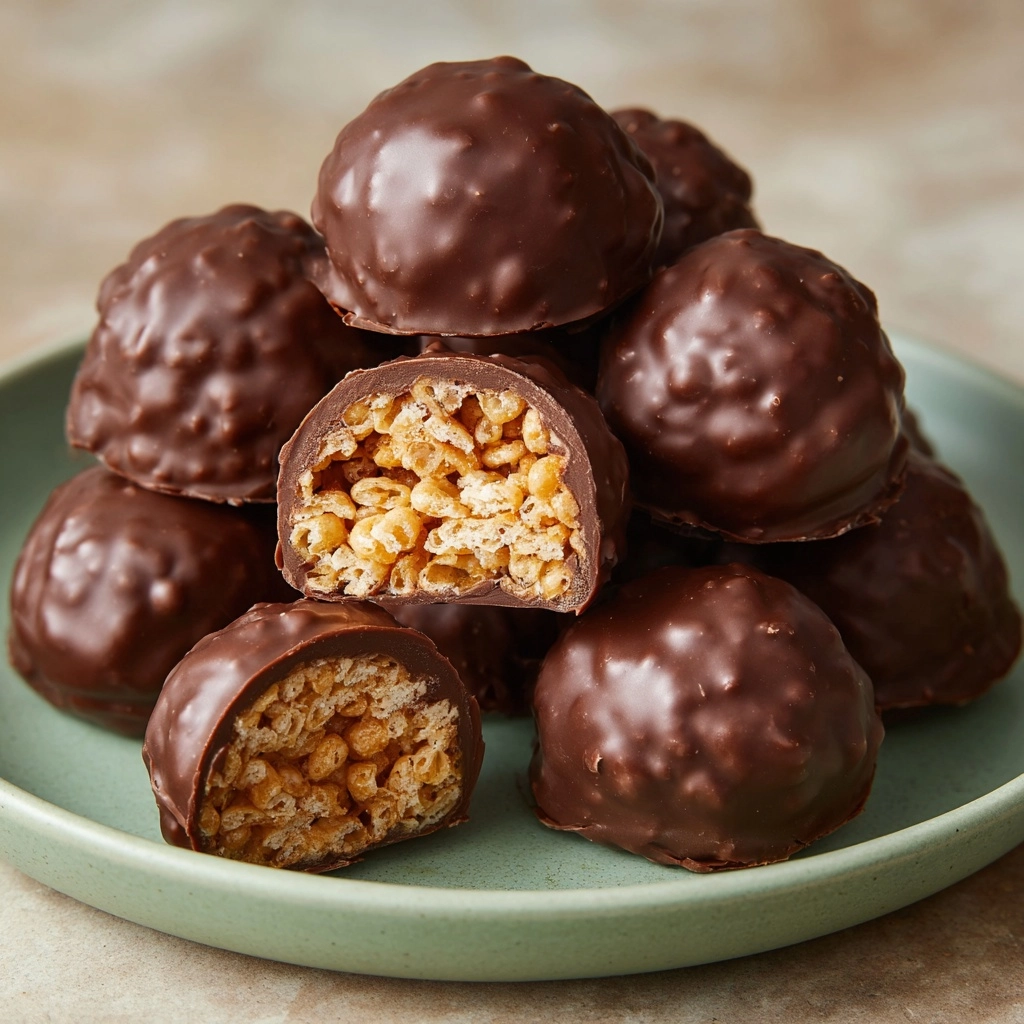
If you’re searching for a sweet treat that’s effortless, irresistibly delicious, and sure to light up the eyes of anyone who sees them, Chocolate Rice Krispie Balls are about to become your new favorite no-bake snack. These bite-sized wonders blend crispy cereal, creamy peanut butter, and rich chocolate into a treat that’s crunchy and creamy all at once. Whether you’re making them for a holiday platter, a lunchbox surprise, or just because you’re craving something quick and chocolatey, Chocolate Rice Krispie Balls deliver pure joy in every bite.
Ingredients You’ll Need
Every ingredient in Chocolate Rice Krispie Balls plays a starring role, creating a perfect harmony of texture and flavor with just a handful of pantry staples. Here’s what you’ll need, and why each one matters:
- Rice Krispies cereal: The essential crispy, crunchy foundation that gives every bite its signature light texture.
- Semi-sweet chocolate chips: They melt into a rich, chocolatey coating that makes these treats totally crave-worthy.
- Creamy peanut butter: Adds deep flavor and a soft, luscious texture—smooth peanut butter makes mixing a breeze.
- Unsalted butter: Deepens the flavor while binding everything together for perfectly shaped balls.
- Powdered sugar: Lends sweetness and a bit of structure, helping the mixture set beautifully.
- Vanilla extract: A splash of vanilla brightens all the flavors for that classic homemade vibe.
- Salt: Just a pinch balances the sweetness and makes all the flavors pop.
- Optional sprinkles or crushed nuts: For rolling—these add an extra burst of color, crunch, or a twist of nutty flavor if you’re feeling fancy!
How to Make Chocolate Rice Krispie Balls
Step 1: Prepare the Dry Ingredients
Start by grabbing a large mixing bowl. Add the Rice Krispies cereal and powdered sugar, tossing gently to combine. This step ensures that every bite is evenly sweet and perfectly crunchy later on—no clumps, just even, airy goodness throughout.
Step 2: Melt the Chocolate, Peanut Butter, and Butter
In a small saucepan set over low heat, combine the semi-sweet chocolate chips, creamy peanut butter, and unsalted butter. Stir constantly until the mixture is velvety smooth and totally melted. Taking it slow and stirring ensures the chocolate doesn’t scorch and the peanut butter blends seamlessly.
Step 3: Add Vanilla and Salt
Remove the saucepan from the heat and immediately stir in the vanilla extract and salt. This quick addition at the end guarantees the vanilla’s aroma and the salt’s flavor-enhancing magic stay fresh and vibrant in every ball.
Step 4: Mix It All Together
Pour the warm, chocolatey mixture right over the cereal/sugar blend in your mixing bowl. Use a sturdy spatula or wooden spoon to gently mix until the Rice Krispies are coated evenly. It’ll look glossy and smell amazing—like pure nostalgia in a bowl!
Step 5: Shape Into Balls
Allow the mixture to cool just slightly (about 5 minutes), so it’s not too hot to handle but still pliable. Scoop out about a tablespoon of mixture at a time and roll into 1-inch balls with clean hands. Line them up on a parchment-lined baking sheet for easy clean-up.
Step 6: Finish With Sprinkles or Nuts (Optional)
If you want to jazz up your Chocolate Rice Krispie Balls, now’s the moment! Roll each ball in colorful sprinkles or finely crushed nuts for extra crunch and a festive finish. It’s not just about looks; this step adds fun texture and another layer of flavor.
Step 7: Chill Until Firm
Transfer your tray of finished balls to the refrigerator for at least 30 minutes. This quick chill firms them up, so they hold their shape and have the perfect chewy, crispy bite when you serve them.
How to Serve Chocolate Rice Krispie Balls
Garnishes
Dress up Chocolate Rice Krispie Balls with a variety of toppings to make them pop. A sprinkle of sea salt flakes, a drizzle of melted white chocolate, or a dusting of extra powdered sugar can turn these simple treats into party-worthy bites. Kids love rainbow sprinkles for a playful look, while adults might go for a dusting of cocoa powder or finely chopped nuts for a touch of sophistication.
Side Dishes
Although Chocolate Rice Krispie Balls shine on their own, pairing them with a scoop of vanilla ice cream, fresh berries, or even a mug of hot cocoa makes for a delightfully indulgent dessert plate. For parties, set up a small platter of other bite-sized nibbles like fruit kabobs or mini cookies to complement these chocolatey gems.
Creative Ways to Present
For festive gatherings, pile Chocolate Rice Krispie Balls into mini cupcake liners or arrange them on tiered dessert stands for a whimsical display. You can even thread two or three onto a skewer or popsicle stick and wrap them in cellophane for adorable party favors. Around the holidays, mix in a handful of colored sprinkles to match the season or shape small clusters for fun edible “ornaments.”
Make Ahead and Storage
Storing Leftovers
Keep your Chocolate Rice Krispie Balls fresh by storing them in an airtight container in the refrigerator. They’ll stay perfectly chewy and crunchy for about a week—though if your household is anything like mine, they’ll disappear well before then! Make sure to separate layers with wax paper to prevent sticking.
Freezing
Chocolate Rice Krispie Balls freeze beautifully. Simply place them in a single layer on a baking sheet, freeze until firm, then transfer to a freezer bag or airtight container. They’ll keep for up to two months, and you can grab a couple whenever the craving hits—no need to thaw if you like them cold!
Reheating
While there’s no need to reheat these no-bake delights, you can let frozen balls sit at room temperature for 10 to 15 minutes so they soften slightly before serving. Avoid microwaving as it can melt the chocolate and undo all that perfect texture.
FAQs
Can I use a different nut butter in Chocolate Rice Krispie Balls?
Absolutely! Almond butter or sunflower seed butter work beautifully and can make these treats both peanut-free and uniquely flavorful. Just use the same amount as you would peanut butter and enjoy a subtle, fresh twist.
Why do my Rice Krispie Balls fall apart?
If your balls are crumbly, check that you’ve used the right ratio of wet to dry ingredients and haven’t skipped chilling them. Mixing thoroughly and allowing the mixture to cool before shaping ensures everything binds together. If your kitchen is warm, extra fridge time can help set them up just right.
Can I add mix-ins to the recipe?
Definitely! Toss in a handful of mini marshmallows, crushed pretzels, or even dried fruit before rolling. It’s a fun way to jazz up the flavor and texture, and kids love helping out at this step.
How do I make them extra festive for holidays?
Roll the finished Chocolate Rice Krispie Balls in colored sprinkles that match the season or use themed candy melts for dipping. Even a dusting of edible glitter or a drizzle of contrasting melted chocolate gives instant holiday cheer.
Are these gluten-free?
If you need a gluten-free version, just make sure to grab a certified gluten-free crispy rice cereal. The rest of the ingredients are naturally gluten-free, making this a very allergy-friendly treat with a simple swap.
Final Thoughts
If you’ve never tried making Chocolate Rice Krispie Balls, now is the time! They’re the kind of treat that instantly brings smiles, no matter the occasion. I’m always amazed by how just a few ingredients can come together to create such pure comfort. So gather your ingredients, invite a friend or some eager kitchen helpers, and enjoy every gooey, chocolatey, crispy bite!