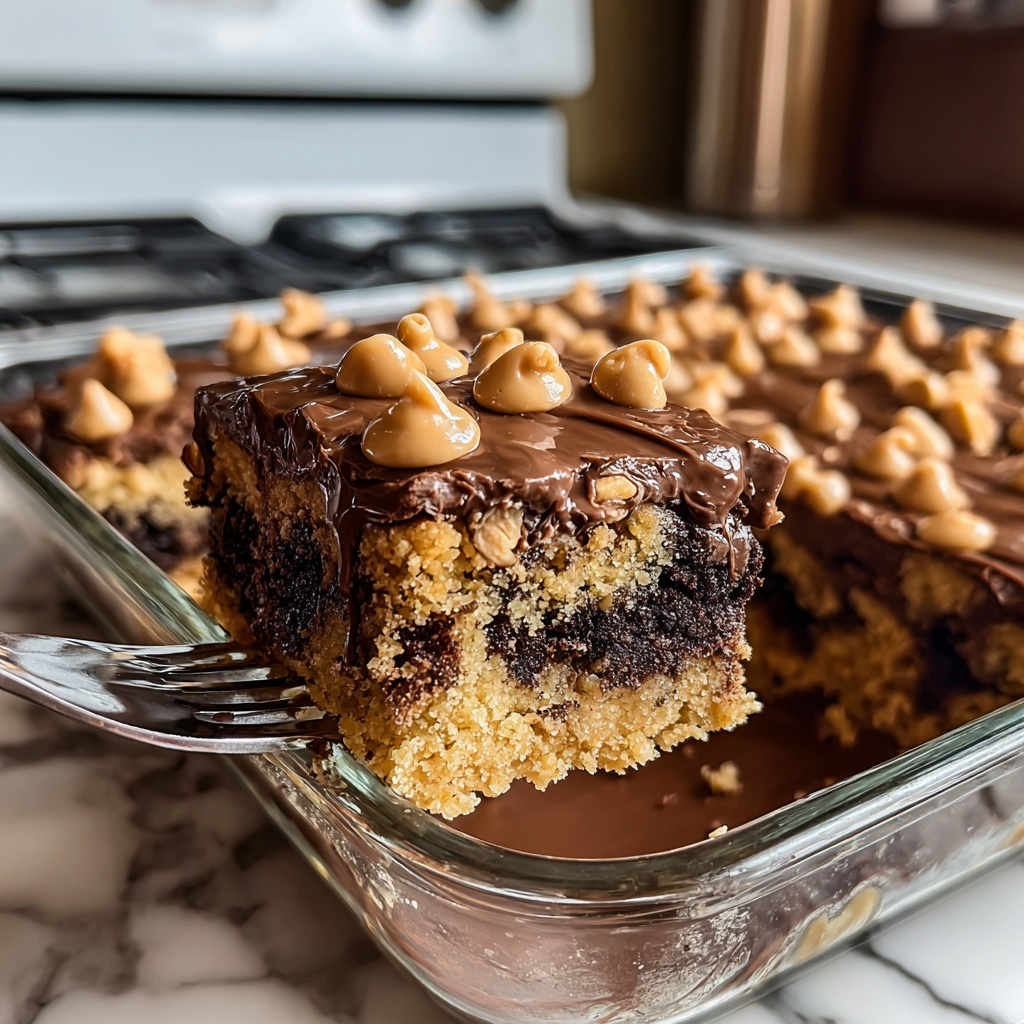
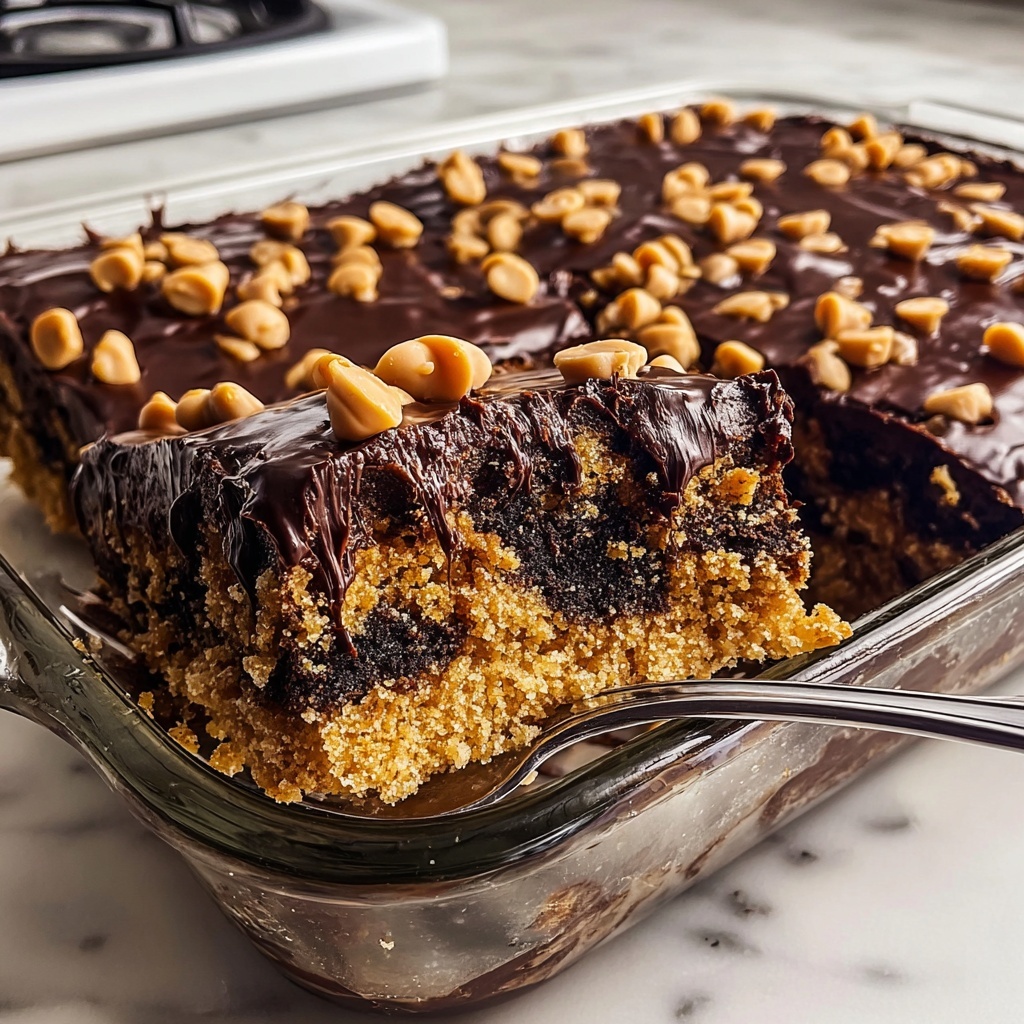
If you’re craving a dessert that’s deliciously indulgent yet incredibly easy to make, this Peanut Butter Cup Dump Cake Recipe is pure magic. It’s a fantastic marriage of rich chocolate cake, creamy peanut butter pockets, and gooey melted bits that come together in one effortless bake. The combination of textures and flavors will make this cake your new go-to for serving guests or treating yourself after a long day. Trust me, once you try this recipe, it’s going to feel like a secret weapon in your baking repertoire.
Ingredients You’ll Need
All the ingredients for this Peanut Butter Cup Dump Cake Recipe are pantry staples and simple additions that create big flavor and perfect texture. Each item plays its part, from moisture to sweetness to that decadent peanut butter punch.
- Chocolate cake mix: This forms the base of the cake, delivering a rich and tender crumb with minimal effort.
- Instant chocolate pudding mix: Adds moisture and a luscious fudgy texture that keeps the cake incredibly soft.
- Large eggs: Helps bind all the ingredients together while giving the cake structure.
- Whole milk: Contributes creaminess and ensures a moist batter.
- Unsalted butter, melted: Brings richness and a golden crust to the finished cake.
- Creamy peanut butter cups, chopped: The star ingredient that bursts with melty peanut butter and chocolate flavor in every bite.
- Chocolate chips (optional): For an extra hit of chocolate throughout, making it even more irresistible.
How to Make Peanut Butter Cup Dump Cake Recipe
Step 1: Prepare Your Baking Dish
Preheat your oven to 350°F (175°C) and grease a 9×13 inch baking dish thoroughly. Greasing is essential here to make sure your cake doesn’t stick and comes out perfectly shaped for serving.
Step 2: Mix the Dry and Wet Ingredients
In a large bowl, combine the chocolate cake mix and instant pudding mix. Add the eggs, whole milk, and melted butter into the bowl and stir until you get a smooth, uniform batter. This step ensures every bite is rich and fudgy.
Step 3: Fold in the Peanut Butter Cups
Gently fold the chopped creamy peanut butter cups into the batter. Stir just enough to distribute the pieces evenly without breaking them up too much, so you get gooey pockets of peanut butter throughout.
Step 4: Transfer Batter to Baking Dish
Pour the batter into the prepared baking dish and spread it out evenly with a spatula. This ensures the cake bakes uniformly and gives those peanut butter cups the perfect melting ground.
Step 5: Bake Until Perfect
Bake in the preheated oven for 30 to 35 minutes. You’ll know it’s ready when a toothpick inserted into the center comes out clean or with only a few moist crumbs. Be careful not to overbake—this cake is best when moist and tender.
Step 6: Cool and Get Ready to Serve
Allow the cake to cool slightly in the pan so it sets up a bit and is easier to cut. This cooling phase helps the melted peanut butter cups firm up into delectable pockets inside the cake.
How to Serve Peanut Butter Cup Dump Cake Recipe

Garnishes
Top slices with a drizzle of chocolate ganache or a sprinkle of crushed peanut butter cups for added texture and flair. A little dollop of whipped cream or a scoop of vanilla ice cream on the side elevates this simple cake into a showstopper dessert.
Side Dishes
This cake shines best on its own or paired with fresh berries to balance the richness. Coffee or a cold glass of milk also complement the chocolate and peanut butter flavors beautifully, making each bite even more satisfying.
Creative Ways to Present
For a fun twist, serve this dump cake in individual ramekins or mason jars, layered with whipped cream or mini peanut butter cups on top. It also works perfectly as a trifle layer paired with chocolate mousse or fresh fruit.
Make Ahead and Storage
Storing Leftovers
Store leftover cake in an airtight container at room temperature for up to 2 days to maintain freshness. If your kitchen is warm, placing it in the fridge helps the cake keep its structure, especially because of the peanut butter cups inside.
Freezing
You can freeze this cake by wrapping it tightly in plastic wrap and then foil for up to 2 months. Thaw it overnight in the fridge before reheating to enjoy that gooey, freshly baked texture again.
Reheating
Reheat individual slices in the microwave for 15 to 20 seconds or warm the entire cake at a low oven temperature (about 300°F) for 10 minutes. This helps refresh the melty peanut butter and chocolate flavors to perfection.
FAQs
Can I use other types of peanut butter cups?
Absolutely! Feel free to experiment with peanut butter cups that have crunchy bits or even those with added caramel for extra flavor layers. Just chop them into bite-sized pieces for even distribution.
Is it necessary to use instant pudding mix?
The instant pudding mix adds incredible moisture and a fudgy texture to the cake, but if you don’t have it on hand, you can skip it. Just be aware the cake may be slightly less dense and moist without it.
Can I substitute dairy ingredients for non-dairy options?
Yes, you can swap whole milk for almond milk or oat milk and use dairy-free butter alternatives. The texture might vary slightly, but the Peanut Butter Cup Dump Cake Recipe will still be deliciously satisfying.
How can I make this cake nut-free?
Since peanut butter cups are the star, nut-free substitutions are tricky. However, you could replace them with chocolate chips and swirl in some sunflower seed butter or cookie butter to maintain the creamy pockets.
Why is it called a dump cake?
Dump cake gets its name because the recipe requires you to simply “dump” ingredients together rather than making a traditional batter from scratch. It’s an easy, no-fuss way to enjoy a rich, homemade cake.
Final Thoughts
Whether you’re a peanut butter lover or just someone who appreciates effortless desserts that taste like a dream, this Peanut Butter Cup Dump Cake Recipe has got you covered. It’s quick to prepare yet unbelievably tasty, making it perfect for busy weeknights or impressive weekend treats. I can’t wait for you to bake it and share that warm, melty joy with friends and family.