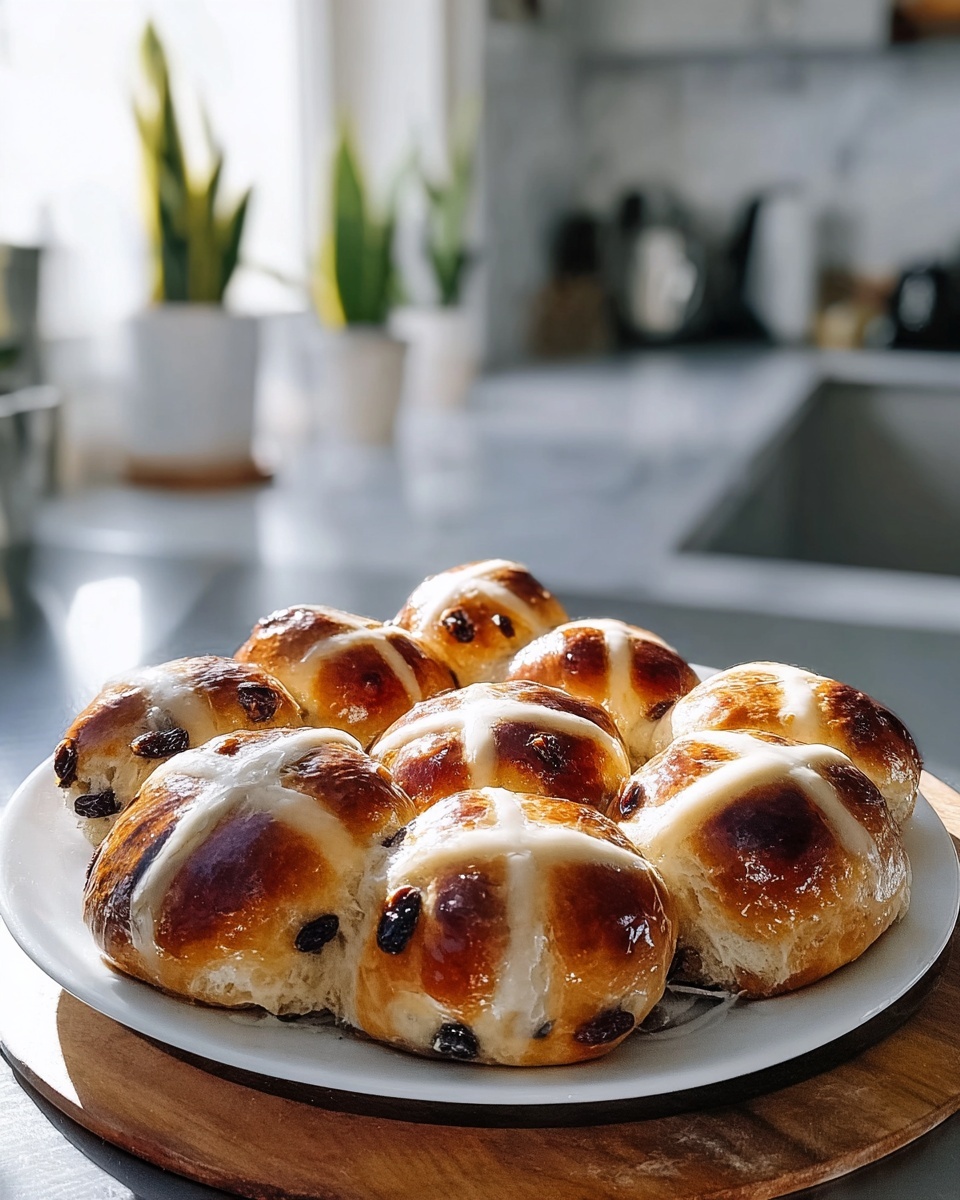
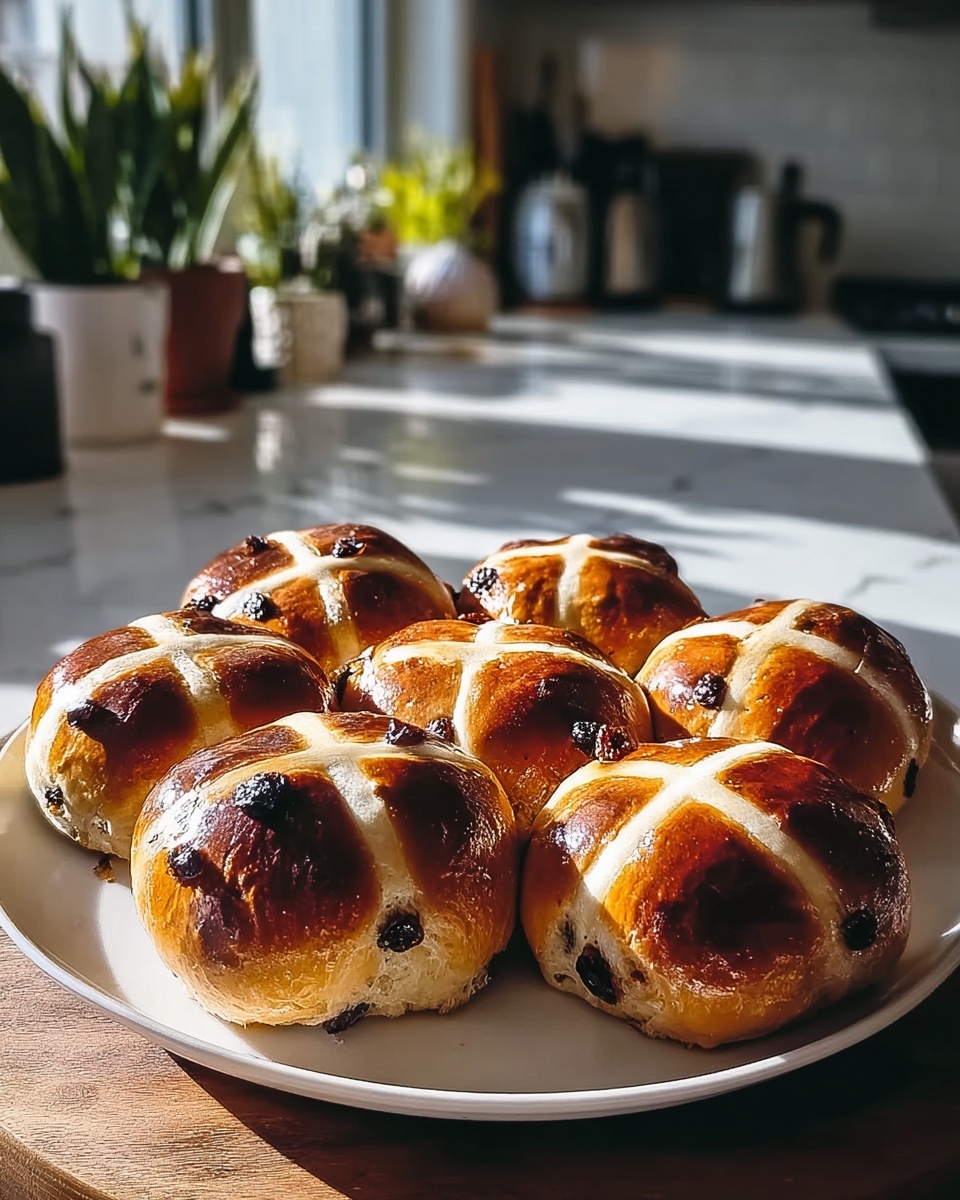
If you’ve ever wished to bring the heartwarming aroma and delight of freshly baked spiced buns right into your kitchen, this Traditional Hot Cross Buns Recipe is going to be your new best friend. These buns are perfectly soft, subtly sweet, and generously studded with currants or raisins, with a lightly spiced dough accented by cinnamon and nutmeg. Glazed with a simple sweet icing cross on top, they’re an evergreen favorite that brings together comfort and a bit of classic charm in every bite. Whether you’re baking for a festive occasion or simply craving a homemade treat, this recipe captures the essence of tradition with an irresistible twist.

Ingredients You’ll Need
Gathering the right ingredients is half the journey to making the perfect Traditional Hot Cross Buns Recipe. Each element here plays an essential role, from the soft richness of butter to the warm spices that give the buns their distinctive character.
- 4 cups all-purpose flour: The foundation that gives the buns their structure and tender crumb.
- 2 tsp active dry yeast: The magical ingredient that helps the dough rise and become airy.
- 1 cup whole milk (warm): Provides richness and activates the yeast for a lively dough.
- 1/4 cup granulated sugar: Adds subtle sweetness and helps with browning.
- 1/4 cup unsalted butter (softened): Ensures the buns are tender and moist.
- 1 tsp ground cinnamon: Brings warm, inviting spice that is signature to hot cross buns.
- 1/2 tsp ground nutmeg: Adds depth and a slightly nutty aroma to the flavor profile.
- 1 cup dried currants or raisins: Bursts of chewy sweetness scattered throughout each bun.
- 2 large eggs: Help bind the dough and enrich the texture.
- 1 cup powdered sugar (for glaze): Used to make the classic glossy cross finish on top.
- Water or lemon juice (for glaze): Thins the powdered sugar for the perfect pourable icing glaze.
How to Make Traditional Hot Cross Buns Recipe
Step 1: Activate the yeast
Start by waking up your yeast. Combine the warm milk with the active dry yeast and a teaspoon of sugar in a small bowl. Let the mixture sit for around 5 to 10 minutes until it becomes frothy and alive. This step ensures your dough will rise beautifully and have that light, fluffy texture we all love.
Step 2: Create the dough
In a large mixing bowl, whisk together the flour, cinnamon, nutmeg, the remaining sugar, and a pinch of salt. Make a well in the center and pour in the softened butter, beaten eggs, and the frothy yeast mixture. Stir everything until the ingredients come together into a shaggy dough—don’t worry if it seems loose at first; kneading will fix that.
Step 3: Knead the dough
Lightly flour your countertop and transfer the dough. Knead it solidly for 8 to 10 minutes until the texture feels smooth and elastic. This is the workout that develops the gluten and gives your buns that springy, soft bite.
Step 4: First rise
Lightly oil a large bowl and place your kneaded dough inside. Cover the bowl with a damp cloth or plastic wrap to keep it cozy. Set it in a warm, draft-free spot and allow it to rise for about 1 to 2 hours, or until doubled in size. This slow rise builds flavor and creates the airy crumb structure.
Step 5: Add fruits
Once risen, gently punch down the dough to deflate it. Sprinkle your dried currants or raisins evenly over the dough, then fold them in carefully so they are distributed without tearing the dough.
Step 6: Shape the buns
Divide your dough into 12 to 15 equal parts. Roll each portion into a smooth ball and place them spaced a little apart on a baking tray lined with parchment paper. This step produces those lovely round buns that bake evenly.
Step 7: Second rise
Cover the shaped buns again and let them rest for about an hour so they can puff up and double in size. While they’re rising, preheat your oven to 375°F (190°C) to get it ready for baking. The buns should look soft and pillowy before going in.
Step 8: Bake the buns
Pop the tray into the preheated oven and bake for about 20 to 25 minutes. You’ll know they’re done when they’re beautifully golden brown on top and have a slight firmness to the touch. The smell alone will have everyone eager to dig in.
Step 9: Glaze your buns
Once out of the oven, let the buns cool just slightly. Prepare a simple glaze by mixing the powdered sugar with a splash of water or lemon juice until smooth and pourable. Drizzle this sweet glaze over the warm buns to create the signature cross on top that finishes the look and adds an extra pop of flavor.
How to Serve Traditional Hot Cross Buns Recipe
Garnishes
While the classic glaze cross is essential, you can also sprinkle a little extra cinnamon sugar on top for crunch or brush the buns with melted butter as soon as they cool for a soft sheen and a touch of richness. Some like to add a smear of cream cheese or butter right before eating—pure coziness!
Side Dishes
Traditional Hot Cross Buns Recipe are wonderful on their own, but pairing them with a cup of strong tea, coffee, or even a glass of milk takes the experience up another notch. For a special treat, try serving alongside fresh fruit preserves or honey to complement the spices and dried fruit.
Creative Ways to Present
Try slicing the buns horizontally and making mini sandwiches with clotted cream and jam for an elevated teatime vibe. Or arrange them in a bread basket with a colorful cloth napkin for a rustic, inviting presentation. Hot cross buns can also be transformed into French toast for an indulgent weekend breakfast twist.
Make Ahead and Storage
Storing Leftovers
If you have any buns left after indulging, store them in an airtight container or tightly wrapped in plastic wrap at room temperature. They’ll remain soft and fresh for about 2 to 3 days—perfect for snacking or breakfast the next morning.
Freezing
Traditional Hot Cross Buns Recipe freeze wonderfully. Wrap each bun individually in plastic wrap, then place in a freezer-safe bag to prevent freezer burn. They can be kept frozen for up to 2 months without losing flavor or texture.
Reheating
To enjoy frozen or leftover buns, gently warm them in a microwave for 15 to 30 seconds or pop them in a preheated oven at 350°F (175°C) for about 5-10 minutes. Brushing with a little melted butter after reheating will refresh their softness and flavor beautifully.
FAQs
Can I use other dried fruits instead of currants or raisins?
Absolutely! Feel free to experiment with dried cranberries, chopped dried apricots, or even sultanas. Each will bring a unique flavor and texture, making the Traditional Hot Cross Buns Recipe your own.
What can I substitute for whole milk?
You can use any milk your household prefers—skim, 2%, or even plant-based milks like almond or oat milk. Just make sure the milk is warm to activate the yeast properly.
Do I have to use active dry yeast, or can I use instant yeast instead?
Instant yeast can work too. If you use instant yeast, you can mix it directly with the dry ingredients without proofing it in warm milk first, which saves a step.
Why are my buns dense instead of light and fluffy?
Density usually results from not kneading enough or not allowing the dough to rise fully. Make sure to knead for the full time until smooth and elastic, and give the dough plenty of warm time to rise in both stages.
Is it necessary to glaze the buns?
The glaze adds the signature sweetness and the iconic cross on each bun’s surface, enhancing both flavor and appearance. While you can skip it, it truly completes the Traditional Hot Cross Buns Recipe experience.
Final Thoughts
There’s something truly special about making Traditional Hot Cross Buns Recipe at home—the comforting smells, the tender texture, and that classic combination of spice, fruit, and sweet glaze. I promise you, once you’ve baked your first batch, these buns will become a beloved part of your kitchen traditions. So grab your ingredients and dive in; your perfect hot cross buns journey is waiting!